If, like me, you are inquisitive and/or enjoy experimenting with technology then it may be the case that you'd like to dabble with alternative operating systems every once in a while.
In this tutorial, I'll show you how to create a Microsoft Windows 10 bootable USB Drive using a Mac. It may be that you do not presently have a Windows computer to do this or it may be that you prefer to create things with a Mac rather than resorting to a Windows box.
Preparation
For this tutorial you will need the following:
- Apple Mac computer
- ISO download of Windows 10
- A USB drive of 8GB or more
The software that I'll be using to create the USB installer is:
- OS X Yosemite 10.10.5
- Boot Camp Assistant
It is not necessary to be using Yosemite. The procedure is the same for other recent versions of OS X.
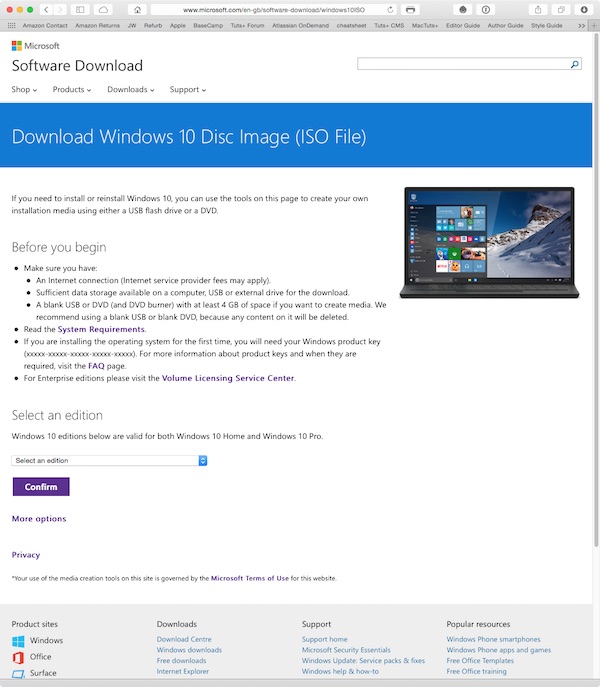
Obtaining a Windows 10 ISO
It is first necessary to download a copy of the Windows 10 ISO, though you'll need to log in first.

In order to download Windows 10, you'll need to have signed up to the Windows Insider programme with a Microsoft Account ID.
This programme is similar to Apple's Developer Programme and is free to join. If you do not have a Microsoft Account ID, or Windows Insider login, you can create one atinsider.windows.com.
Creating the USB Installer
Once you've downloaded the Windows 10 ISO, you'll be creating the USB installer using Apple's Boot Camp Assistant.
Boot Camp Assistant is normally used to partition the hard drive of a Mac in order that it can be booted into either Mac OS X or Microsoft Windows.
In this case, Boot Camp Assistant will be used only to create the USB installer and it is necessary to pay attention so as not to partition the internal hard drive, or SSD, inside the Mac.
If you are in any doubt, back up the Mac before you proceed. You'll have a regular back up routine, anyway, no doubt.
1. Insert a Blank 8GB USB drive

The USB drive that you'll be using will be completely overwritten by the process, so you'll need to be sure that any data on the USB drive is backed up elsewhere. Alternatively, use a brand new, blank USB drive for peace of mind.
Note, the USB drive must be a minimum of 8GB. It is possible to use a 16GB, or larger, USB drive if you do not have an 8GB drive available.
2. Launch Boot Camp Assistant
The Boot Camp Assistant utility lives in Applications > Utilities. You can navigate to this location and click on the app to launch it.

A quicker way is to press Command-Spacebar, together, to bring up Spotlight. Type Boot Camp Assistant to find the utility and press Enter to launch it.
You'll most likely find that Spotlight has located the utility as soon as you've entered the first word.
If you use Alfred, you can find Boot Camp Assistant by pressing Option-Spacebar, together, type Boot Camp Assistant to find the utility and press Enter to launch it.

When you have read the Introduction, press Continue.
Select Boot Camp Tasks
Boot Camp Assistant can perform three tasks:
- Create a Windows USB installer for Windows 7, or later
- Download the latest Windows support software from Apple
- Install Windows, 7 or later, on the Mac

All of these options are ticked by default. You'll need to deselect option 3, Install Windows 7 or later version, otherwise Boot Camp Assistant will proceed with the partitioning of the Mac's internal drive. This is not a necessary part of the process for creating the USB installer.

When you have only options 1 and 2 selected, click Continue.
4. Locate ISO to Create Bootable USB Drive
In order to create a bootable USB drive, for Windows 10, select the Windows 10 ISO file that you downloaded earlier.
This has most likely been downloaded the the Downloads folder. If so, Boot Camp Assistant may well have identified it and pre-populated the path in the ISO image field.

If not, press Choose... and navigate to the downloaded ISO and select it.
Ensure that the Destination Disk is set to the USB drive that you've inserted into the Mac.

Press Continue to proceed with the erasing and formatting of the USB drive.
5. Configuration


Leave Boot Camp Assistant to do its thing. It will take some time to format and create the USB boot installer.
When the process of creating the USB boot installation drive has completed.

Boot Camp Assistant will display a message saying Your bootable USB drive has been created. The USB drive will have been renamed to WININSTALL.
Click Quit to close Boot Camp Assistant.
The USB installer is now complete. Secondary-click on the WININSTALL icon, on the desktop, and select Eject "WININSTALL".

The Windows 10 bootable USB drive is now complete and ready for deployment in configuring new PCs.
Conclusion
In this tutorial I have shown you how to create a Windows 10 bootable USB install drive for the purposes of having backup media available for reinstalling Windows 10 or for the purpose of installing Windows 10 on new PCs.

محول الاكواد محول الأكواد اضافة الإبتسمات اضافة الإبتسمات تابع المدونة تابع المدونة